Showing posts with label Images. Show all posts

Creating a Picture Link in Blogger Posts

Creating a Picture Link in Blogger Posts

You can also create picture link so that when a user clicks an image in your post, a new blog or a website will open. By default, when you upload a picture, it is linked to itself. For example, I've uploaded the following image, click it to see what happens:


So by default this image is linked to itself. If you've clicked it, you would have seen that same image is opened in the same tab. So, we'll change this image link.

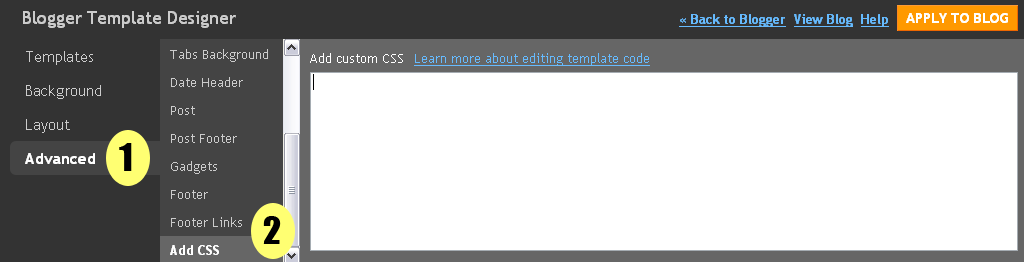
Creating an Image Link in New Post Editor


To change the image link, please switch to the 'Edit HTML' tab of your post editor.


You'll see that there is no image there. Instead, there will be only code. Actually, this code is the HTML of our image. 'Compose' mode shows us the compiled HTML and 'Edit HTML' mode shows the raw HTML code. Anyways, now we'll do a little bit of editing.

This is the code for the above uploaded image.

<div class="separator" style="clear: both; text-align: center;">
<a href="https://blogger.googleusercontent.com/img/b/R29vZ2xl/AVvXsEiMR85XkpkNAK-gsrgIa3MPT8hPSkmaXRCn6sHnhDVeNSqzm79Shx1X9f1E4jqLDQrvbBI35YzIrY2tjAV3rx5LwETWQfpbm9YxSB_w8IRfDvH_goKkelQydRCzC17CffW9AzHRX6JvTdrC/s1600/1330057_flower.jpg" imageanchor="1" style="margin-left:1em; margin-right:1em"><img border="0" height="225" width="300" src="https://blogger.googleusercontent.com/img/b/R29vZ2xl/AVvXsEiMR85XkpkNAK-gsrgIa3MPT8hPSkmaXRCn6sHnhDVeNSqzm79Shx1X9f1E4jqLDQrvbBI35YzIrY2tjAV3rx5LwETWQfpbm9YxSB_w8IRfDvH_goKkelQydRCzC17CffW9AzHRX6JvTdrC/s400/1330057_flower.jpg" /></a></div>


Please note that there will be 2 addresses or URLs in the uploaded image. For my image, these are the URLs.

https://blogger.googleusercontent.com/img/b/R29vZ2xl/AVvXsEiMR85XkpkNAK-gsrgIa3MPT8hPSkmaXRCn6sHnhDVeNSqzm79Shx1X9f1E4jqLDQrvbBI35YzIrY2tjAV3rx5LwETWQfpbm9YxSB_w8IRfDvH_goKkelQydRCzC17CffW9AzHRX6JvTdrC/s1600/1330057_flower.jpg


&

https://blogger.googleusercontent.com/img/b/R29vZ2xl/AVvXsEiMR85XkpkNAK-gsrgIa3MPT8hPSkmaXRCn6sHnhDVeNSqzm79Shx1X9f1E4jqLDQrvbBI35YzIrY2tjAV3rx5LwETWQfpbm9YxSB_w8IRfDvH_goKkelQydRCzC17CffW9AzHRX6JvTdrC/s400/1330057_flower.jpg


There is only 1 difference in the image URLs which is s1600 and s400. First URL with s1600 is actually the link URL. It is responsible for making this image a link. Second URL with s400 is the source URL. It displays the image.

As I've already told you that, by default, the image is linked to itself. So we need to change the first URL in our image code. For example, if I want to link the above uploaded image to my blog's homepage which is http://www.betatemplates.com/. I'll only replace my blog homepage URL with the first URL in the image code. After that, the image code will look something like this:

<div class="separator" style="clear: both; text-align: center;">
<a href="http://www.betatemplates.com/" imageanchor="1" style="margin-left:1em; margin-right:1em"><img border="0" height="225" width="300" src="https://blogger.googleusercontent.com/img/b/R29vZ2xl/AVvXsEiMR85XkpkNAK-gsrgIa3MPT8hPSkmaXRCn6sHnhDVeNSqzm79Shx1X9f1E4jqLDQrvbBI35YzIrY2tjAV3rx5LwETWQfpbm9YxSB_w8IRfDvH_goKkelQydRCzC17CffW9AzHRX6JvTdrC/s400/1330057_flower.jpg" /></a></div>

As you can see that I've only changed the first URL. Second URL is still an image. Now, if you'll click the following image, it will take you to my homepage.


Make Image Link Open in a New Window or Tab

If you're linking your image to some other blog or website then it is pretty desirable to make it open in a new window or tab. By doing this, visitors will stay on your blog.

To do this, I'll just add target="_blank" in the image code just after the link address. The code will look like this:

<div class="separator" style="clear: both; text-align: center;">
<a href="http://www.betatemplates.com/" target="_blank" imageanchor="1" style="margin-left:1em; margin-right:1em"><img border="0" height="225" width="300" src="https://blogger.googleusercontent.com/img/b/R29vZ2xl/AVvXsEiMR85XkpkNAK-gsrgIa3MPT8hPSkmaXRCn6sHnhDVeNSqzm79Shx1X9f1E4jqLDQrvbBI35YzIrY2tjAV3rx5LwETWQfpbm9YxSB_w8IRfDvH_goKkelQydRCzC17CffW9AzHRX6JvTdrC/s400/1330057_flower.jpg" /></a></div>


And the image will look same. However, now it will open in a new window or tab.

Blogspot How to: Make Images Not Clickable (No Enlarge)

By default, images in Blogger are linked to their full size which means if someone clicks on an image, the same image is opened in full size. This is confusing for blog visitors and it also takes the visitors away from your blog. If you want to make your uploaded images not click-able then I'll tell you a simple trick to do that.

Note: Before reading the tutorial, make sure you know the type of your post editor. If you don't know the type of your editor then simply go to Settings | Basic and at the end of the page, you can see the type of your post editor. Anyways, I'll explain the trick in both old and new post editors.


1- Make Images Not Clickable in Old Post Editor


Make sure you're working in Edit HTML of the old post editor. You can change the editing mode from top right of the post editor. So, upload your image as you normally do. After the image is uploaded, you'll see some code in the post editor. This code is actually the HTML of your uploaded image and it will look something like this:
<a onblur="try {parent.deselectBloggerImageGracefully();} catch(e) {}" href="https://blogger.googleusercontent.com/img/b/R29vZ2xl/AVvXsEjs0zq21Zd8Z_5pCM8cD0nYtTg4-qz_Srjw3OxDey0u1cRWH-1LZnfUvH5v2kQaTQI_-KrfyGREnNmVH7bjZPWdF3jvuYfsGpD2Z-_Vr_EahTekwJYinQGtLslpWCKMu2W4UtFb237zrQE/s1600/This+is+an+Image.jpg"><img style="display: block; margin: 0px auto 10px; text-align: center; cursor: pointer; width: 259px; height: 194px;" src="https://blogger.googleusercontent.com/img/b/R29vZ2xl/AVvXsEjs0zq21Zd8Z_5pCM8cD0nYtTg4-qz_Srjw3OxDey0u1cRWH-1LZnfUvH5v2kQaTQI_-KrfyGREnNmVH7bjZPWdF3jvuYfsGpD2Z-_Vr_EahTekwJYinQGtLslpWCKMu2W4UtFb237zrQE/s400/This+is+an+Image.jpg" alt="" id="BLOGGER_PHOTO_ID_5536049028840403346" border="0" /></a>

The code for my image is divided in Red and Green parts. The Red part is responsible for making the image a link and green part displays the image. So, you need to delete that part of your image which is marked red in my image and leave the Green part as it is.

1- Make Images Not Clickable in New Updated Post Editor


So, if you're using the new updated post editor then the code for uploaded image will be a little different. Just make sure you're working in the Edit HTML mode. In Edit HTML mode of the post editor, you'll see the code of the uploaded image instead of the image itself. So, upload an image and you'll see some code like this:
<div class="separator" style="clear: both; text-align: center;">
<a href="https://blogger.googleusercontent.com/img/b/R29vZ2xl/AVvXsEhOmK8A0irD0j-9gZpmjg9EZ8R_gVbTB0w2a39XC6qY5aNYOcd-5boq_HAHx2g5mQSJlInc9tF3Hs9Ph5_xe-GcoR7rg9OjaBSlphCNV3PhjdOv7Kn5XMkjSVPw3mZg46VF6YYi4WlTHNc/s1600/This+is+an+Image.jpg" imageanchor="1" style="margin-left: 1em; margin-right: 1em;"><img border="0" src="https://blogger.googleusercontent.com/img/b/R29vZ2xl/AVvXsEhOmK8A0irD0j-9gZpmjg9EZ8R_gVbTB0w2a39XC6qY5aNYOcd-5boq_HAHx2g5mQSJlInc9tF3Hs9Ph5_xe-GcoR7rg9OjaBSlphCNV3PhjdOv7Kn5XMkjSVPw3mZg46VF6YYi4WlTHNc/s1600/This+is+an+Image.jpg" /></a></div>

As you can see that the code is divided in Red, Green and Blue parts. reen part displays the image, Red makes it a link and Blue is responsible for the alignment of the image. So, just delete the red part from your image and it will not be click-able.

How to Add Image as Blog Background

We can easily add a background image in a Blogger/Blogspot blog. To add an image as your blog background, first of all you need to do 3 things:

1- Select an image.
2- Upload it.
3- Add it to your blog HTML.

1- Select an Image


This is a fairly simple thing, you can either chose an image wallpaper from your computer or web. Of course, if you're selecting a full wallpaper then it will be quite heavy in size and eventually your blog will take too much time to load.

I recommend you to use a pattern instead of a large image. A pattern is also an image but it has a very small size and it is repeated in the blog background. We can use it to cover whole background through a CSS background property which will be explained later.

Tip: Go to Din Patterns to download high quality patterns for your blog background.

2- Upload it


I assume that you've already selected an image or a pattern and now we need to upload it on some image host. Fortunately, Blogger provides each user 1Gb free space to store images which is more than enough, so just upload your image on Blogger and then come back.

How to Host Images on Blogger

3- Add it to your blog HTML


I'm assuming that now you've completed the previous two steps and we're ready to move on. Now, you need to follow these simple steps to complete this tutorial:

1- Go to Design -> Edit HTML and find:

body {
background:$bgcolor;
margin:0;
color:$textcolor;
font:x-small Georgia Serif;
font-size/* */:/**/small;
font-size: /**/small;
text-align: center;
}


You might not be able to find the exact above code but you'll definitely find some code of this form:

body {
.
.
.
Some Code Here
.
.
.
}


2- Once you've found the above mentioned code, you need to add following code in it:

background-image:url(URL of your image from step 2);
background-repeat: repeat;
background-attachment: fixed;


Please note that this code is only for adding a pattern, if you're adding a large image, please see the heading Aligning Background Image later in this tutorial otherwise continue from here. After adding the code mentioned in Step 2, overall code should look something like this:

body {
background:$bgcolor;
margin:0;
color:$textcolor;
font:x-small Georgia Serif;
font-size/* */:/**/small;
font-size: /**/small;
text-align: center;
background-image:url(URL of your image from step 2);
background-repeat:repeat;
background-attachment: fixed;

}


3- Replace URL of your image from step 2 with your uploaded image URL which you uploaded above in this tutorial.

4- You can also try changing background-attachment: fixed; to background-attachment: scroll;. This way, your background will also move when you scroll your blog but I won't recommend doing this.

Aligning Background Image


If you've added a background image (not pattern) then it's very important to align it correctly. Here is the code to add an image in the background:

background-image:url(URL of your image from step 2);
background-repeat: no-repeat;
background-attachment: fixed;
background-position: left top;


Overall, the code should look something like this:

body {
background:$bgcolor;
margin:0;
color:$textcolor;
font:x-small Georgia Serif;
font-size/* */:/**/small;
font-size: /**/small;
text-align: center;
background-image:url(URL of your image from step 2);
background-repeat: no-repeat;
background-attachment: fixed;
background-position: left top;
}


As you can see, I've changed the code a bit by changing repeat to no-repeat and also adding Background Position property. The no-repeat will make sure that our image doesn't repeat itself. The Background Position property has 2 parameters which define horizontal and vertical positioning of an image. In the above code, horizontal position is left and vertical position is Top so our image will be placed according to these parameters. Here is a list of possible parameters of Background Position property.

background-position: left top;
background-position: left center;
background-position: left bottom;

background-position: right top;
background-position: right center;
background-position: right bottom;

background-position: center top;
background-position: center center;
background-position: center bottom;


Final Thoughts


People love personalizing their blogs and adding an image in blog background surely adds more personalization in a blog. This is the most famous tutorial on Beta Templates and I'm thankful to you guys for that.

How to Post Large High Quality Images


By default, Blogger decreases the size and quality of an image in the post. We can make some modifications in the uploaded image code to retain the quality.

Upload an Image as usual


I've uploaded an image from my computer with width 515px and height 402px. When the image was uploaded, the width and height both have decreased resulting in a smaller image. This is how the image looks like:

How to Post Large High Quality Images

And this is the code:


<a onblur="try {parent.deselectBloggerImageGracefully();} catch(e) {}" href="https://blogger.googleusercontent.com/img/b/R29vZ2xl/AVvXsEg9KmQQtVPUZLWDhmxBVQ2MBLnickrHCIbzLbee_hgcukK6lhXTBnTxkatUuzQYzYHK0PGPOVf-D0kSD0sNafLjm1NKtS4l9swjylZyiRcYRsxWVPABSCgnci4GX-nXVmI0rufMexAHagQ/s1600-h/add+recent+comments+widget+for+blogger+2.PNG"><img style="margin: 0px auto 10px; display: block; text-align: center; cursor: pointer; width: 400px; height: 312px;" src="https://blogger.googleusercontent.com/img/b/R29vZ2xl/AVvXsEg9KmQQtVPUZLWDhmxBVQ2MBLnickrHCIbzLbee_hgcukK6lhXTBnTxkatUuzQYzYHK0PGPOVf-D0kSD0sNafLjm1NKtS4l9swjylZyiRcYRsxWVPABSCgnci4GX-nXVmI0rufMexAHagQ/s400/add+recent+comments+widget+for+blogger+2.PNG" alt="" id="BLOGGER_PHOTO_ID_5352758256344287250" border="0" /></a>


Note: You can see the code only in Edit HTML mode of the post editor. You can find this mode at the top right of the editor.


As you can see from the image code that width is now 400px (original 515px) and height is 312px (original 402px). To fix this problem, take a closer look at the image code. There are two URLs in this code, one is for larger size (s1600-h) and the other is for smaller size (s400). That's why when you click on an image, the same image opens up in full size.

Let's do some good changes in the code


The trick you'll apply here is to replace the smaller image URL with the larger image URL which means replacing the address of smaller image:


https://blogger.googleusercontent.com/img/b/R29vZ2xl/AVvXsEg9KmQQtVPUZLWDhmxBVQ2MBLnickrHCIbzLbee_hgcukK6lhXTBnTxkatUuzQYzYHK0PGPOVf-D0kSD0sNafLjm1NKtS4l9swjylZyiRcYRsxWVPABSCgnci4GX-nXVmI0rufMexAHagQ/s400/add+recent+comments+widget+for+blogger+2.PNG


with the address of larger image:


https://blogger.googleusercontent.com/img/b/R29vZ2xl/AVvXsEg9KmQQtVPUZLWDhmxBVQ2MBLnickrHCIbzLbee_hgcukK6lhXTBnTxkatUuzQYzYHK0PGPOVf-D0kSD0sNafLjm1NKtS4l9swjylZyiRcYRsxWVPABSCgnci4GX-nXVmI0rufMexAHagQ/s1600-h/add+recent+comments+widget+for+blogger+2.PNG


After these changes, the image code should look like this:


<a onblur="try {parent.deselectBloggerImageGracefully();} catch(e) {}" href="https://blogger.googleusercontent.com/img/b/R29vZ2xl/AVvXsEg9KmQQtVPUZLWDhmxBVQ2MBLnickrHCIbzLbee_hgcukK6lhXTBnTxkatUuzQYzYHK0PGPOVf-D0kSD0sNafLjm1NKtS4l9swjylZyiRcYRsxWVPABSCgnci4GX-nXVmI0rufMexAHagQ/s1600-h/add+recent+comments+widget+for+blogger+2.PNG"><img style="margin: 0px auto 10px; display: block; text-align: center; cursor: pointer; width: 400px; height: 312px;" src="https://blogger.googleusercontent.com/img/b/R29vZ2xl/AVvXsEg9KmQQtVPUZLWDhmxBVQ2MBLnickrHCIbzLbee_hgcukK6lhXTBnTxkatUuzQYzYHK0PGPOVf-D0kSD0sNafLjm1NKtS4l9swjylZyiRcYRsxWVPABSCgnci4GX-nXVmI0rufMexAHagQ/s1600-h/add+recent+comments+widget+for+blogger+2.PNG" alt="" id="BLOGGER_PHOTO_ID_5352758256344287250" border="0" /></a>


You need to do two more things here to make image original size. Delete s1600-h from image source URL. If s1600-h is not present, proceed with tutorial. The code should now look like this:


<a onblur="try {parent.deselectBloggerImageGracefully();} catch(e) {}" href="https://blogger.googleusercontent.com/img/b/R29vZ2xl/AVvXsEg9KmQQtVPUZLWDhmxBVQ2MBLnickrHCIbzLbee_hgcukK6lhXTBnTxkatUuzQYzYHK0PGPOVf-D0kSD0sNafLjm1NKtS4l9swjylZyiRcYRsxWVPABSCgnci4GX-nXVmI0rufMexAHagQ/s1600-h/add+recent+comments+widget+for+blogger+2.PNG"><img style="margin: 0px auto 10px; display: block; text-align: center; cursor: pointer; width: 400px; height: 312px;" src="https://blogger.googleusercontent.com/img/b/R29vZ2xl/AVvXsEg9KmQQtVPUZLWDhmxBVQ2MBLnickrHCIbzLbee_hgcukK6lhXTBnTxkatUuzQYzYHK0PGPOVf-D0kSD0sNafLjm1NKtS4l9swjylZyiRcYRsxWVPABSCgnci4GX-nXVmI0rufMexAHagQ/+recent+comments+widget+for+blogger+2.PNG" alt="" id="BLOGGER_PHOTO_ID_5352758256344287250" border="0" /></a>


Last thing you need to do is to change width and height to that of original image.


<a onblur="try {parent.deselectBloggerImageGracefully();} catch(e) {}" href="https://blogger.googleusercontent.com/img/b/R29vZ2xl/AVvXsEg9KmQQtVPUZLWDhmxBVQ2MBLnickrHCIbzLbee_hgcukK6lhXTBnTxkatUuzQYzYHK0PGPOVf-D0kSD0sNafLjm1NKtS4l9swjylZyiRcYRsxWVPABSCgnci4GX-nXVmI0rufMexAHagQ/s1600-h/add+recent+comments+widget+for+blogger+2.PNG"><img style="margin: 0px auto 10px; display: block; text-align: center; cursor: pointer; width: 515px; height: 402px;" src="https://blogger.googleusercontent.com/img/b/R29vZ2xl/AVvXsEg9KmQQtVPUZLWDhmxBVQ2MBLnickrHCIbzLbee_hgcukK6lhXTBnTxkatUuzQYzYHK0PGPOVf-D0kSD0sNafLjm1NKtS4l9swjylZyiRcYRsxWVPABSCgnci4GX-nXVmI0rufMexAHagQ/s1600-h/add+recent+comments+widget+for+blogger+2.PNG" alt="" id="BLOGGER_PHOTO_ID_5352758256344287250" border="0" /></a>


Now, our image looks like this:


Just to clarify the difference, here is the originally uploaded image:


Be careful when posting large images


You can't use image of any width in your template because a template has specific width allowed for posting area. An image with too much width can be problematic and without proper CSS definitions, the image might overlap sidebar.

To avoid this, you can create a scroll bar around your image which will make sure that the image will never be cut off or overlap due to size. The format of this property is like this:


<div style="overflow:auto;">
YOUR IMAGE CODE COMES HERE
</div>


For example, I can use the code of my uploaded image here like this:


<div style="overflow:auto;">
<a onblur="try {parent.deselectBloggerImageGracefully();} catch(e) {}" href="https://blogger.googleusercontent.com/img/b/R29vZ2xl/AVvXsEg9KmQQtVPUZLWDhmxBVQ2MBLnickrHCIbzLbee_hgcukK6lhXTBnTxkatUuzQYzYHK0PGPOVf-D0kSD0sNafLjm1NKtS4l9swjylZyiRcYRsxWVPABSCgnci4GX-nXVmI0rufMexAHagQ/s1600-h/add+recent+comments+widget+for+blogger+2.PNG"><img style="margin: 0px auto 10px; display: block; text-align: center; cursor: pointer; width: 515px; height: 402px;" src="https://blogger.googleusercontent.com/img/b/R29vZ2xl/AVvXsEg9KmQQtVPUZLWDhmxBVQ2MBLnickrHCIbzLbee_hgcukK6lhXTBnTxkatUuzQYzYHK0PGPOVf-D0kSD0sNafLjm1NKtS4l9swjylZyiRcYRsxWVPABSCgnci4GX-nXVmI0rufMexAHagQ/s1600-h/add+recent+comments+widget+for+blogger+2.PNG" alt="" id="BLOGGER_PHOTO_ID_5352758256344287250" border="0" /></a>
</div>


Tip: Whenever you use a large image (width above 550px), you should use the overflow property. Don't worry if the image is small in width, it will not create a scroll bar.


Although, the best method to post large images is to increase the width of the template posting area. You can ask for that if you want to.

Blogspot How to: Host Images on Blogger

Why Should I Upload Images on Blogger???


Image hosting sites like Photobucket & TinyPic have a bandwidth limit. Which means if your uploaded image is viewed too many times then a ridiculous notification will appear instead of your images. So, avoid using such services. Blogger provides 1Gb of free space to every user for images and that's more than enough.

This is why I hate Photobucket!


Photobucket bandwidth exceeded image

Steps to upload your images on Blogger!


To use Blogger as your image host, follow these steps:

1- Log in to your Blogger account click New Post button to create a new post.

Blogspot Tip: It doesn't matter if you have one or multiple blogs, you can create a new post in any of your blogs.

2- In the new post make sure you're working in Edit HTML mode.

3- Now click on the Add Image icon to upload your image.

4- A new small window will open to upload your image or images (maximum 5 at a time).


5- You can either upload images from your computer or give URL of some other picture to add to your post. I'm uploading an image from my computer by clicking the browse button and giving image location on the hard drive. Make sure to chose Large as image size!

6- Once your image is uploaded, you'll see some code like this in the post editor:

<a onblur="try {parent.deselectBloggerImageGracefully();} catch(e) {}" href="https://blogger.googleusercontent.com/img/b/R29vZ2xl/AVvXsEgMFwFMMHj8mbHmeITmdK8P-dsD0Wb7yuJbP761kuUe8vS6g_4brvwRLLHrrUNZzgq7kaG_wc8-MpsOthDtesy0DCeP3ZGZU_d7aKYqSCj2TwnjSAErDomEJVmivTmfsaQFUx-hT2ZFFsQ/s1600/add+new+picture+window.PNG"><img style="cursor:pointer; cursor:hand;width: 400px; height: 262px;" src="https://blogger.googleusercontent.com/img/b/R29vZ2xl/AVvXsEgMFwFMMHj8mbHmeITmdK8P-dsD0Wb7yuJbP761kuUe8vS6g_4brvwRLLHrrUNZzgq7kaG_wc8-MpsOthDtesy0DCeP3ZGZU_d7aKYqSCj2TwnjSAErDomEJVmivTmfsaQFUx-hT2ZFFsQ/s400/add+new+picture+window.PNG" border="0" alt=""id="BLOGGER_PHOTO_ID_5351602214730857826" /></a>

7- There are two image URLs in the above picture code, one is the source of the image (Green) and the other (Blue) is the URL to which the image is linked.

Note: As you can see that the source image URL is linked to itself which means that when you'll click on this image, the same image will be opened on the same page.

8- We've nothing to do with the URL of the source image (Green), all we need to do is to copy the other (Blue) URL and use it wherever we want to use.

9- So, this is the URL or address of our uploaded image:

https://blogger.googleusercontent.com/img/b/R29vZ2xl/AVvXsEgMFwFMMHj8mbHmeITmdK8P-dsD0Wb7yuJbP761kuUe8vS6g_4brvwRLLHrrUNZzgq7kaG_wc8-MpsOthDtesy0DCeP3ZGZU_d7aKYqSCj2TwnjSAErDomEJVmivTmfsaQFUx-hT2ZFFsQ/s1600/add+new+picture+window.PNG

10- Use it wherever you want. You can also delete the post after uploading your images but I'll recommend you to save it as a Draft because you might need the URLs of the uploaded images again in the future.

Update!


If you guys are unable to upload on Blogger then there is a great alternative out there, imgur. Uploading an image there is incredibly easy and quick.

I'm Unable to Upload Pictures on Blogger

I'm Unable to Upload Pictures on Blogger

If you're upload your photos in posts and it says Done but there is no photo in Post Editor then there is a simple solution to this problem.

Upload your photo as you do normally but when it says Done, don't close the photo uploading window. Right click on that photo and copy the image location.


Tip: In Firefox browser right, click | Copy Image Location.

Tip: In Google Chrome right, click | Copy Image URL.

Tip: In Internet Explorer 6, right click | Properties | Address:(URL).


Now you've the uploaded image URL, close that window and in the post editor, enter this code:


<img src="IMAGE URL HERE" alt="ALTERNATIVE TEXT HERE">


Replace IMAGE URL HERE with the URL of the image you copied earlier and instead of ALTERNATIVE TEXT HERE you can add some words regarding picture, these words will appear if, for some reason, the image can't be shown.


Let's check an example...


For example, I copied the URL of image in this post and now I'll use it in my post using this technique.

A tutorial on uploading photos problem

The code for this image is:


<IMG SRC="https://blogger.googleusercontent.com/img/b/R29vZ2xl/AVvXsEi1fFqRu2LHUTiqZqzNCiz6Q983AIHwneD1ZYf-kG8V5l8ktVgKyR6Bbihr_q3qzL49SCpGPFNXOOCzy79ELHnq2tREmpGMInL3Q4EsLEuYaRN0LRtOEz1z5hm_b0LcQMZzPe-_yIqIcNo/+photos+problem.PNG" ALT="A tutorial on uploading photos problem">


Create a scroll bar to make my example image completely visible!


As you can see that my example image is not completely visible but same image has a scroll bar on the top. You can also add a large image with a scroll bar. The scroll bar will automatically placed if the image has too much width. Use this code:


<div style="overflow:auto;">
<IMG SRC="https://blogger.googleusercontent.com/img/b/R29vZ2xl/AVvXsEi1fFqRu2LHUTiqZqzNCiz6Q983AIHwneD1ZYf-kG8V5l8ktVgKyR6Bbihr_q3qzL49SCpGPFNXOOCzy79ELHnq2tREmpGMInL3Q4EsLEuYaRN0LRtOEz1z5hm_b0LcQMZzPe-_yIqIcNo/+photos+problem.PNG" ALT="A tutorial on uploading photos problem">
</div>


Actually, I have just added a property overflow:auto; which will create a scroll bar only if needed otherwise there will be no scroll bar.

Blogspot How to: Add Image as Sidebar Background

Some time ago I posted an article How to Add Image as Sidebar Background Heading Similarly you can also add an image in the whole sidebar. Just follow these simple steps and if you feel any difficulty at any step, feel free to ask:

1- On your Blogger Dashboard, go to "Edit Layout" and then "Edit HTML" section.

Remember: Before doing any changes to your blog, always backup your template by clicking the "Download Full Template" link.

2- Now, find the following code...


#sidebar-wrapper {
width: 220px;
float: $endSide;
word-wrap: break-word; /* fix for long text breaking sidebar float in IE */
overflow: hidden; /* fix for long non-text content breaking IE sidebar float */
}


Info: Actually this code is defining the appearance of your sidebar.

3- Add some more style definitions in the above code and your code will become like this...


#sidebar-wrapper {
width: 220px;
float: $endSide;
word-wrap: break-word; /* fix for long text breaking sidebar float in IE */
overflow: hidden; /* fix for long non-text content breaking IE sidebar float */
background-image:url('URL of uploaded image here');
background-repeat: repeat;
background-attachment: scroll;
background-position: right top;}
}

As you can see that the green code is representing newly added text and the red code is to be replaced by the image URL.

4- Don't change any setting in the above code except URL of uploaded image here which will be replaced by the uploaded image.

5- After adding your own image, first see the preview and then save the template if you're happy.

Tip: You can get free professional patterns at http://www.dinpattern.com/

Tip: When I was writing this tutorial, I downloaded this pattern from here. It's size was 42x36 and it weighed only 1.50 kb. You can also try it, the URL is https://blogger.googleusercontent.com/img/b/R29vZ2xl/AVvXsEi5EyiJZPEWd1TJyH8ayGzUWrV9yG4hr9KZUuTTroH1hTQ8zMZ85aEadaaldp1SytsjCWeZe83bKvepOTbgxd9tSR2KAcCt9gaSmZyCPHaJRpFLXvBWpRIwM2CGl7JTW6ys6OxOMeAtH90/

6- I hope this tutorial was helpful and have a look around, there are many other great tutorials to customize your blog.

How to Add Image as Sidebar Heading Background

To add an image as background of your sidebar heading, follow the simple steps.

1- Go to "Layout" and then "Edit HTML" section.

Remember: In "Edit HTML" section, always click "Download Full Template" before making any changes to your template, this is your backup.

2- Find the following code...


/* Headings
----------------------------------------------- */

h2 {
margin:1.5em 0 .75em;
font:$headerfont;
line-height: 1.4em;
text-transform:uppercase;
letter-spacing:.2em;
color:$sidebarcolor;
}


3- Add the following code in the above code...


background-image:url('URL OF YOUR IMAGE HERE'); /*Enter Image URL here */
background-repeat: no-repeat; /* image repeat horizotally (repeat-x), vertically (repeat-y) or no-repeat */
background-attachment: scroll; /* image should scroll or fixed */
background-position: right top;} /* position of image, first horizontal then vertical */


4- New code should look like this...


/* Headings
----------------------------------------------- */

h2 {
margin:1.5em 0 .75em;
font:$headerfont;
line-height: 1.4em;
text-transform:uppercase;
letter-spacing:.2em;
color:$sidebarcolor;
background-image:url('URL OF YOUR IMAGE HERE'); /*Enter Image URL here */
background-repeat: no-repeat; /* image repeat horizotally (repeat-x), vertically (repeat-y) or no-repeat */
background-attachment: scroll; /* image should scroll or fixed */
background-position: right top;} /* position of image, first horizontal then vertical */
}


Tip: Don't change background-position: right top; because most people want to have their image horizontally on the right side and vertically on the top.

Tip: Also avoid repeating the image and keep background-repeat: no-repeat; as it is.

Tip: Also keep your image on scroll because your heading will also scroll, you can't fix it.

5- Now I'll add a small Blogger icon in the background of my heading to demonstrate the coding we've done above.

6- All I've to change in the step 4 code is to enter the image URL of my own image which is currently a Blogger icon, the code would be...


background-image:url('http://dt.yogtec.com/assets/mainpage/blogger.gif'); /*Enter Image URL here */


The green colored line is my image URL.

7- Now I'll see the preview to see the result, it is something like this...


8- As you can see, the Blogger icon is cropped and not fully visible. So. now I'll increase the line-height: 1.4em; factor in the code of step 4. Lets increase it to 5em and see the preview again, now the result is looking good...


and the final code for my image is something like this:


/* Headings
----------------------------------------------- */

h2 {
margin:1.5em 0 .75em;
font:$headerfont;
line-height: 5em;
text-transform:uppercase;
letter-spacing:.2em;
color:$sidebarcolor;
background-image:url('http://dt.yogtec.com/assets/mainpage/blogger.gif'); /*Enter Image URL here */
background-repeat: no-repeat; /* image repeat horizotally (repeat-x), vertically (repeat-y) or no-repeat */
background-attachment: scroll; /* image should scroll or fixed */
background-position: right top;} /* position of image, first horizontal then vertical */
}


9- I hope the above demonstration was helpful and if you still have any problems you can leave me a comment, I'll try to answer as soon as possible.

10- Keep visiting "Blogger FAQs" and "Happy Blogging".

Beginner's Guide to Customize Blogger Header

What We'll Do?


Our objective is to change the outlook of our header as well as play with the header widget itself.

The Default Code


In your Blogger CSS, the header is defined by the following piece of code:

/* Header
-----------------------------------------------
*/

#header-wrapper {
width:660px;
margin:0 auto 10px;
border:1px solid $bordercolor;
}

#header-inner {
background-position: center;
margin-left: auto;
margin-right: auto;
}

#header {
margin: 5px;
border: 1px solid $bordercolor;
text-align: center;
color:$pagetitlecolor;
}

#header h1 {
margin:5px 5px 0;
padding:15px 20px .25em;
line-height:1.2em;
text-transform:uppercase;
letter-spacing:.2em;
font: $pagetitlefont;
}

#header a {
color:$pagetitlecolor;
text-decoration:none;
}

#header a:hover {
color:$pagetitlecolor;
}

#header .description {
margin:0 5px 5px;
padding:0 20px 15px;
max-width:700px;
text-transform:uppercase;
letter-spacing:.2em;
line-height: 1.4em;
font: $descriptionfont;
color: $descriptioncolor;
}

#header img {
margin-$startSide: auto;
margin-$endSide: auto;
}

Understanding the Default Code


-> #header-wrapper describes overall look of your header.

-> #header will describe the overall look of your blog title and description.

-> #header h1 specifically describes your blog title.

-> #header .description will be responsible for the description of your blog.

-> #header img will become affective if you're using an image as your blog title.

Understood the Default Code? Start Making it Tasty!


I'm changing the overall look of header by making modifications in #header-wrapper.

-> To change the width of your header increase the value of width in #header-wrapper from 660px to a higher number i.e. 750px and see the preview.

-> To add color in the background, you can add background-color:#000000; in #header-wrapper. Please note that #000000 is hex code of black color, you can change it with your desirable code. To easily capture colors on web or on your computer, please download a free program ColorPic from here.

-> Our header border is a thin solid line and it is defined by border:1px solid $bordercolor; in #header-wrapper. If you want to change the thickness of your border, change 1px to 2px and preview. You can also create a dotted line border by replacing solid with dotted. Last thing you can do is to change color of your border, you need to replace $bordercolor with #FF0000. Please note that #FF0000 is the hex code for Red color.

Now I'll try to change the appearance of blog title.


-> The blog title is defined by #header h1.

-> Currently the line-height is 1.2em, change it to 1.5em and you'll see that the space occupied by blog title has increased. Please note that this setting will not affect the font size.

-> Now lets try to change the size of the font. We need to add a new tag in #header h1 which is font-size:15px; and then see the preview, if font size is small increase the 15px otherwise decrease it.

-> To change the font of your blog title, you need to replace font: $pagetitlefont; with font-family: arial, "lucida console", sans-serif; now your blog title will appear in Arial font. I'm adding 3 fonts because your visitor might not have Arial font available on his/her computer then 2nd font can be used.

-> By default, your blog title will appear in uppercase because of text-transform:uppercase; property. Change uppercase to lowercase and then the title will become lowercase. If you don't want both uppercase or lowercase, you can remove text-transform:uppercase;.

-> Last property is letter-spacing:.2em; it defines the spacing between two alphabets. You can increase it (.3em, .4em, .5em) or simply remove it and see the preview.

Add more widgets around header in 'page elements' section.


By default, you can't add any widget around your header because there's no "Add a Gadget" option beneath or above your header. So, lets add that option by ourself.

The default header widget code in 'edit html' section.


First of all we must know the default code, only then we can play with it. If you'll go to "Edit HTML" tab and search for <body> you'll find some code like this some lines after <body> tag...

<div id='header-wrapper'>
<b:section class='header' id='header' maxwidgets='1' showaddelement='no'>
<b:widget id='Header1' locked='true' title='Blogger FAQs | Premium Blogger Templates, Tutorials, Hacks, Tips &amp;amp; Tricks. (Header)' type='Header'/>
</b:section>
</div>

Change the header widget code.


All we need to do is to change the value of 'maxwidgets' from '1' to '3' and 'showaddelement' from 'no' to 'yes' and now the code should look something like this:

<div id='header-wrapper'>
<b:section class='header' id='header' maxwidgets='3' showaddelement='yes'>
<b:widget id='Header1' locked='true' title='Blogger FAQs | Premium Blogger Templates, Tutorials, Hacks, Tips &amp;amp; Tricks. (Header)' type='Header'/>
</b:section>
</div>


What I've done is that I've increased the maximum number of widgets that can be installed around our header (maxwidgets='3') and I've also made the option of "Add a Widget" available in your header (showaddelement='yes') you need to save the template here and go to the "Page Elements" section to see the results.

Why it is good to have more widgets around header?


This is an obvious question and the answer is very simple. Your header is the first area where an incoming visitor will look so you can have an Adsense ad, a search engine, a translator or any other important widget in your header.

How to Add Image in Header Background


Introduction!

Blogger default templates don't have images in the header background. You can add one that suits your taste by changing some style sheet elements in your "Edit HTML" tab between <b:skin> and </b:skin>.

How to Do This???

Please note that following code is responsible for overall header appearance:


#header {
margin: 5px;
border: 1px solid $bordercolor;
text-align: center;
color:$pagetitlecolor;
}


We can change this code by adding some additional tags. So, find the above code in your template style sheet and replace it with the following code:


#header {
width:660px; /* width of header in pixels */
margin:0 auto 10px; /* margin from other elements like posts and sidebar */
border:1px solid #ccc; /* width, type and color of header border */
background: #fff url(YOUR IMAGE URL) no-repeat top right; /* top right indicates background position */
}


You can do changes and see what happens in "Preview" mode. Just change "YOUR IMAGE URL" with actual URL of your image which you want to use as background. You can always try to search for more backgrounds on Google.

Tip!

Always save your template whenever you're not sure about what you're doing. You can do this by clicking on "Download Full Template" link in "Edit HTML" tab.

How to Add Your Own Image as Blog Background in the Template Designer

Add Your Own Image As Background in the Template Designer

The most special thing about Blogger-Blogspot is personalization and ease of use. People love to have a personal image as their blog background. You can see my previous tutorial which makes it fairly easy to add an image as blog background in the older Blogger-Blogspot templates (also called layouts). Now, you can design your very own templates with the new Template Designer. But you can't add your own image as background without knowing HTML and CSS. So, in this tutorial, I'll try to make it very simple to add your own image as blog background.

Things to Do in This Tutorial


So, we need to do 3 different things in this tutorial which are:

1- Select an image from your computer or web.
2- Upload your image on Blogger-Blogspot.
3- Add the uploaded image as blog background.

1- Select an Image From Your Computer or Web.


First of all you've to select an image either from web or your computer. If you like some image on the web then it is better to save that image on your computer. If you've a professional blog then go for a pattern (Download Patterns) as background otherwise personal bloggers might wanna add their personal image as blog background.

2- Upload Your Image on Blogger-Blogspot.


The most convenient way to upload an image on web is to upload it to your Blogger-Blogspot blog. Blogger provides each user 1gb free space so use it. Here is a tutorial to upload your images on Blogger:

How to Host Images on Blogger

After uploading your image on Blogger-Blogspot, make sure to copy the address/URL of your uploaded image because that will be used later.

3- Add the Uploaded Image as Blog Background.


I'm assuming that you've uploaded your image and you've the address/URL of your uploaded image. Now go to Design then Template Designer. From the left column select Advanced and then chose Write CSS. You can click the following image for help:


In the box there, we can add our custom CSS code. So, you need to add the following code in that white box:

body { background: url(URL of Image you uploaded in step 2); background-color: none; }
.body-fauxcolumn-outer div { background: none !important; }


If you're using a pattern then the above code will work great. However, if you're using a big image then you need to take care of the alignment as well. The code for an image will be something like this:

body { background: url(URL of Image you uploaded in step 2) no-repeat scroll top left; background-color: none; }
.body-fauxcolumn-outer div { background: none !important; }


There are 4 things in the code above, let me introduce them to you.

1- no-repeat


It makes sure that the large image doesn't repeat itself. You can change it to repeat if you want to repeat your background image.

2- scroll


You might have noticed that the background image also moves when you scroll down your blog. If you want the background image to stay still in the background then you can change scroll to fixed.

3- top


Top is indicating the vertical positioning of the background image. You can change the vertical positioning to center or bottom.

4- left


Left is responsible for horizontal positioning of your background image. You can also change this value to center or right.

Final Thoughts


I've tried my best to make the HTML and CSS stuff easy for you guys. however, if you still feel any difficulty, feel free to leave me a comment. You can also refer to an official tutorial provided by Google about adding custom CSS in Template Designer.

Pictobrowser, embed a Flickr Slideshow


Embed Picasa Web Albums Slideshow

Picasa SlideshowPicasa Web AlbumsFullscreen

Installation:

1.  Go to the album you want to display in Picasa Web Album.
 

2.  Right-click on the button and "Copy shortcut" (?).
 

3. 
     e.g. http://picasaweb.google.com/jsmith/Album2007?authkey=kqiIFUT#s123456789123456789

4. 
     e.g. My Beautiful Album

5. 
     (You have to be logged in to your Blogger account)

6.  Not at Blogger.com?
     Get the code

Embed a Flash Slideshow from Flickr


    ?